Принцип техники росписи "One stroke"
такой же, как в Жостовской, городецкой, классической гжельской росписях.
Очень напоминает наши народные промыслы.
Суть заключается в том, что рисуется элемент всего одним движением, в один прием.
"Оne stroke", в переводе один мазок. На кисточку набираются одновременно
две краски, и одним движением рисуются лепестки, листья и т.д.
Узнала об этой технике совсем недавно и спешу поделиться с вами!
На первый взгляд техника предельно проста, но здесь всё-таки необходим
навык. Важно уловить принцип правильного ведения кисти. Ну и естественно
практиковаться. Я вот насмотрелась видеоуроков и решила, что сразу
напишу шедевр! Не тут-то было! На первом же элементе я поняла, что до
шедевров мне ещё очень далеко. И всё-таки при желании этой техникой
можно овладеть в короткие сроки!
Изделия, выполненные в технике "One stroke"
Автор работ: Татьяна Кудрявцева
Фото взяла здесь. МАСТЕР-КЛАСС
ЗДЕСЬНачало:
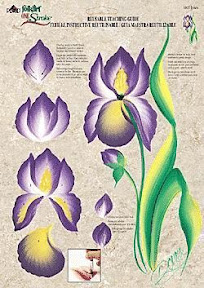
Журнал "Tecnicas de pintura"
Примеры мазков кистью в технике One stroke (и не только)

..


.
.


.

.


.

.


.

.


.


МАСТЕР-КЛАСС РОСПИСИ НА ТАРЕЛКЕ...
ЗДЕСЬПравда на англ. языке, но последовательность и техника понятны...


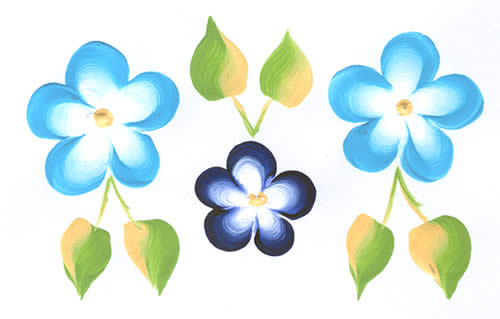
Double load a #8 Flat Brush with
Calypso Sky and Wicker White. Begin and end on the chisel
edge, pivoting the stroke from the base to form a “C” shape.
Build a flower petal one at a time. Dot the center with
Sunflower using the tip of your brush.

Double load a #6 Flat Brush with Night Sky and Wicker White and paint the daisy as shown above.

To build up the pattern paint the larger 5 petal leaves, the smaller 5 petal leaves and then the one stroke leaves :
 РОСПИСЬ ЛЕЙКИ

Double load the #8 Flat Brush with
Titanium White and Berry Wine. Push, wiggle and slide to
create the shell-shaped petal. Make 5 petals for outer
skirt. Place rose bud in centre of outer skirt of rose. Make
4 petals for the second row of shell shaped petals. Re-stroke
pattern of rose bud to clean up before adding 'Comma' strokes. Finish
centre by making three 'Comma' strokes at each side and
below rose bud.

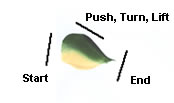
Double load the #8 Flat Brush with Sap Green and Sunflower.

Double load the #8 Flat Brush with
Titanium White and Sunflower. Follow the steps : Push,
Wiggle, Turn, Stop - then slide to tip. Paint the other half
as described before bringing both leaf tips together. Make a
stem on chisel edge.

Double load the #8 Flat Brush with
Titanium White and Yellow Ochre. Build a flower petal one at
a time. Dot the centre with Sap Green by using the tip of
your brush.

Double load the #8 Flat Brush with
Metallic Blue Sapphire and Titanium White. Paint petals one
at a time. Dab or pounce the centre with Yellow Ochre.
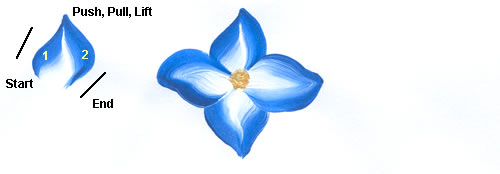
Double load the #8 Flat Brush with
Calypso Sky and Titanium White. Using the chisel edge of
the brush, stroke towards the centre of the flower. Dot
the centre with Yellow Ochre using the wooden tip of the
brush.

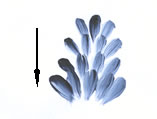
Double load the #8 Flat Brush with
Titanium White and Midnight. Paint the petals with the
chisel edge of the brush. Begin at the top and paint
downwards, layering the petals to form the tapered shape
of the stalk.
Load a small Scruffy Brush with Fresh
Foliage and Titanium White. Pounce straight up and down,
overlapping, half circles to create the moss.

Repeat to build up the complete composition :
 РАМКА ДЛЯ ФОТО

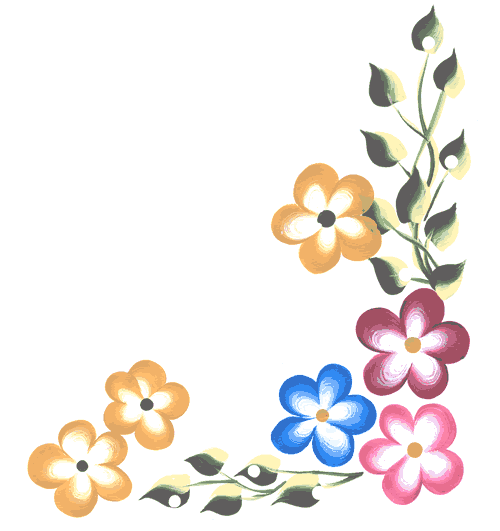
Double load the #8 Flat Brush with
Titanium White and Yellow Ochre. Follow the steps described
above to create a flower. Dot the centre with Sap Green. For
the larger yellow flowers use the #12 Flat Brush. Paint
these flowers on a separate sheet of paper, cut them out when
dry and stick on top of your picture using Sticky Dots giving
your picture a nice 3D effect.

Double load the #8 Flat Brush with Sap Green and Sunflower and create the one stroke leaves.
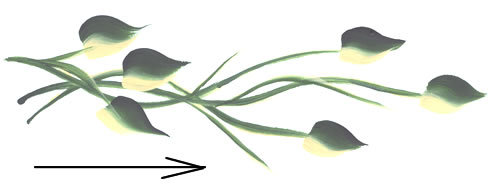
Double load the #8 Flat Brush with Sap
Green and Sunflower. Using the Chisel Edge lead Sunflower,
making up loose, wavy vine. Make the main vine to establish
the flow of the design and then add some trailing vines.
Paint in the One Stroke leaves. Dot the leaves with Titanium
White.

 Пт Сен 14, 2018 9:00 pm автор Admin


 .
.

 .
.


 "
"